If you’ve ever wondered how to remove the front bumper of your Tesla Model 3, or if you need to do it for a repair or modification, you’re in the right place. In this guide, we’ll walk you through the process, making it easy for you to follow along at home. Our expert, Ji, breaks down each step, so even if you’re a newbie to car DIY, you’ll hopefully feel confident tackling this task.
Why Would You Remove the Front Bumper?
Before diving in, you might be wondering why you’d need to remove the bumper in the first place. Common reasons include:
- Installing aftermarket parts: If you’re upgrading your car with new lights, for example, removing the bumper is often necessary.
- Repairing or replacing components: In the event of a minor collision, you might need to replace the bumper or access internal parts.
- Customizing your ride: Whether you’re applying a fresh wrap or installing a custom grill, removing the bumper gives you the access you need.
What You’ll Need
Before starting, gather the following tools:
- Trim removal tools / pry tools
- Ratchet and socket set (8mm & 10mm specifically)
- T40
- Ratchet extension (optional)
- Gloves (optional)
- Lift or Jack (highly recommended)
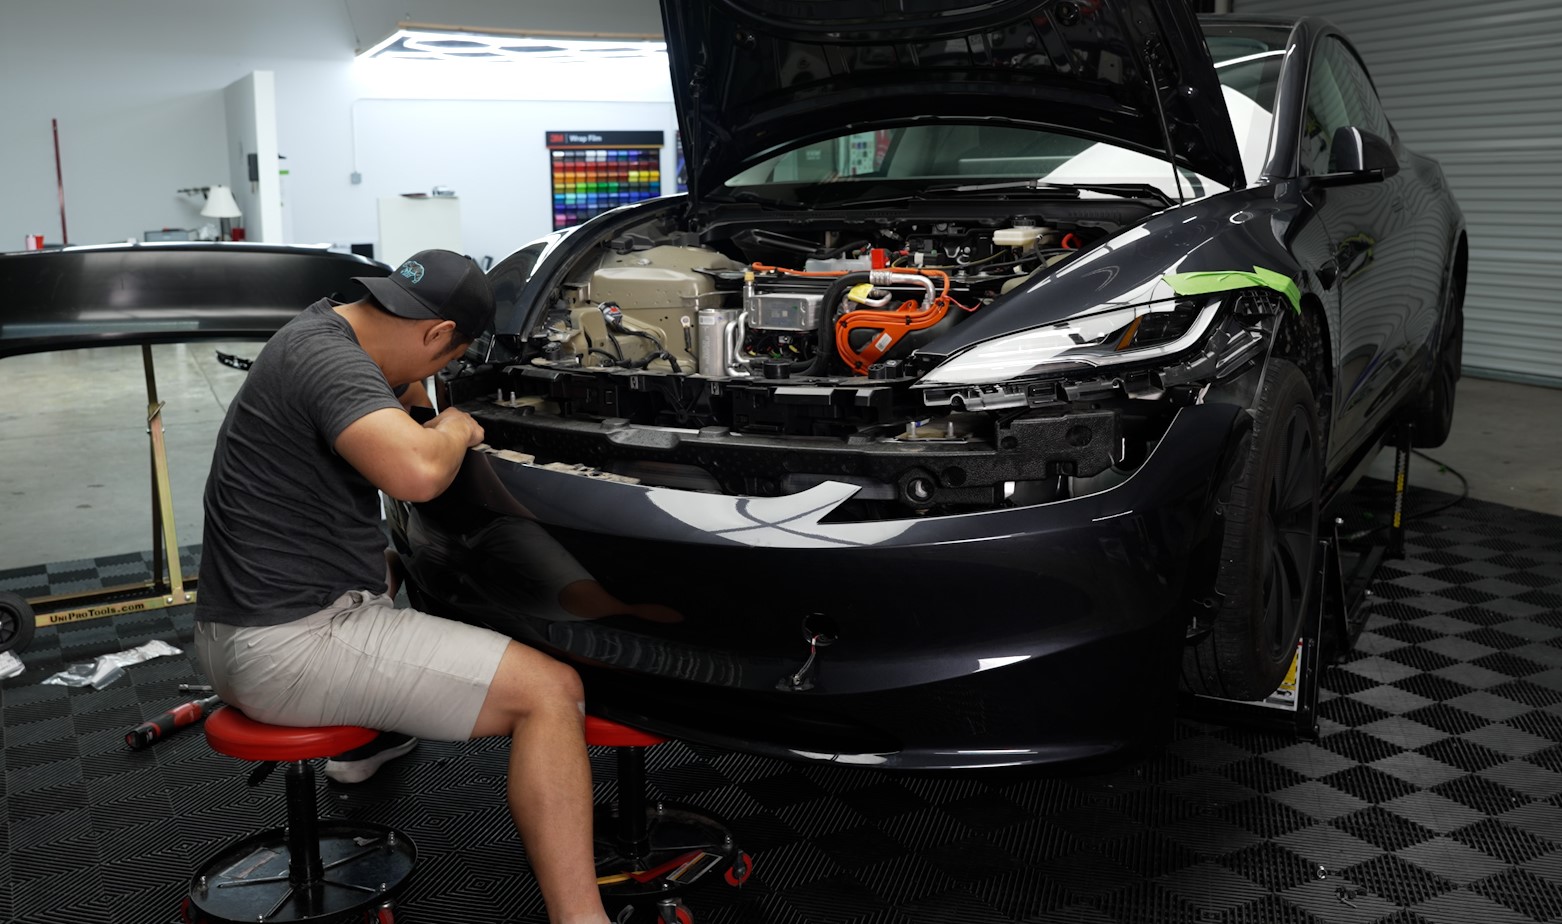
Step 1: Remove The Frunk
First things first, make sure your car is lifted and open the frunk. Now, you can remove the frunk components so you can access the screws on top of the bumper.
Step 2: Removing the Screws
Start by removing the top screws on top of the bumper. I like to keep the middle one in place to hold it so it doesn’t fall while I’m loosening everything up. Then, remove the screws that hold the bumper in place from underneath the car. There are several screws along the bottom edge of the bumper that need to be taken out. Use your ratchet and T40 for this, and make sure to keep the screws in a safe place—you’ll need them for reassembly.
Step 3: Popping Out the Clips
Next, move to the wheel wells. Here, you’ll find clips that secure the bumper to the car. Using your panel removal tool or plastic pry tool, gently pop out these clips. Be careful not to apply too much force, as the clips can be fragile. There are two screws inside the wheel well as well. This takes some patience as they are harder to reach.
Step 4: Detaching the Bumper
With all the screws and clips removed, you’re ready to detach the bumper. Start from one side and gently pull it away from the car. It might require a bit of wiggling and maneuvering carefully with trim tools. There is a clip on top of the bumper where it meets the fender, so be careful around that. Don’t yank it off right away, because there are a couple wires that need to be disconnected first. Carefully disconnect them before fully removing the bumper.
####
Removing the front bumper of your Tesla Model 3 might seem daunting, but with the right tools and a little patience, it’s entirely doable. Whether you’re customizing your ride or performing maintenance, following these steps will help you get the job done.
If you found this guide helpful, don’t forget to check out the video above for a more detailed, hands-on walkthrough with Ji. And if you’re curious about DIY PPF on your Highland, check out this blog for more information.


